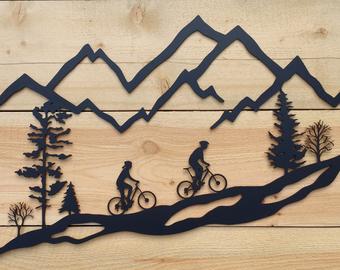
Mountain bikes are versatile as they can be ridden on all kinds of terrain. They provide a fun way to exercise while connecting with nature. However, if it’s your first time going mountain biking, it can be a little daunting choosing the right bike.
The text below highlights some important things to keep in mind when selecting your first mountain bike as well as some appropriate riding techniques and accessories for beginners.
Many bike manufacturers categorize their bikes based on the following mountain biking styles to help you decide what type of bike is appropriate for you.
This is arguably the most common mountain biking style because the category isn’t grounded in any specific type of racing. If you’re interested in meeting up with friends at the local trailhead and riding a mixture of climbs and descents, then this is the style for you. Bikes in this category place equal emphasis on fun, efficiency and sensible overall weight.
This style of riding typically implies riding fast, with an emphasis on climbing prowess. Distances vary from just a few miles to 25-plus, and bikes tend to focus on light weight and efficiency. These bikes can be great if you’re considering getting competitive or would like a racier ride for your local trails.
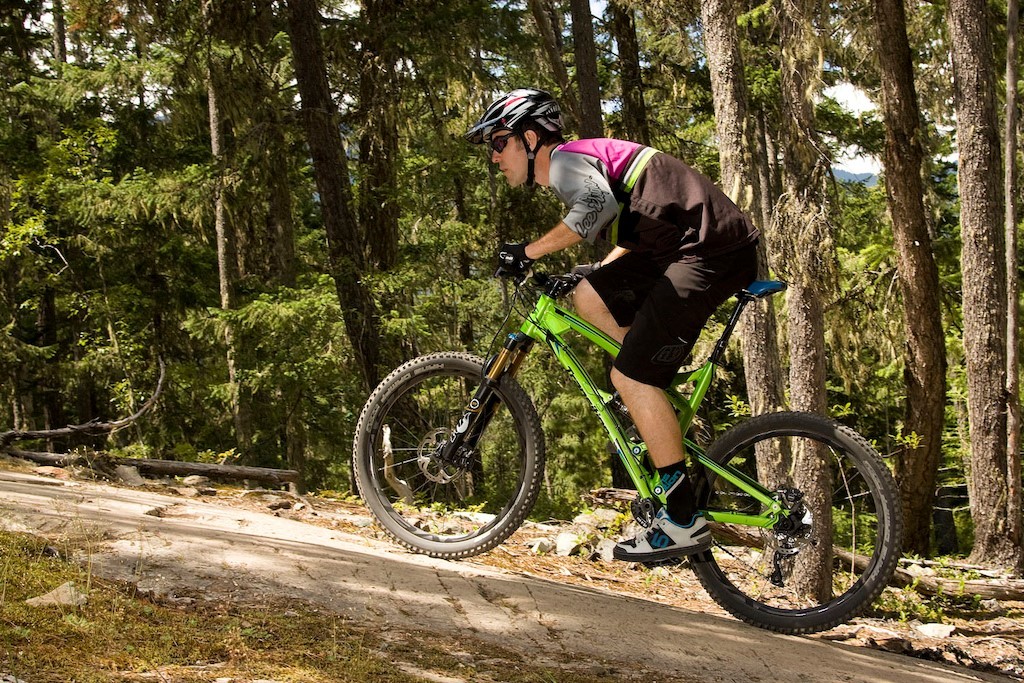
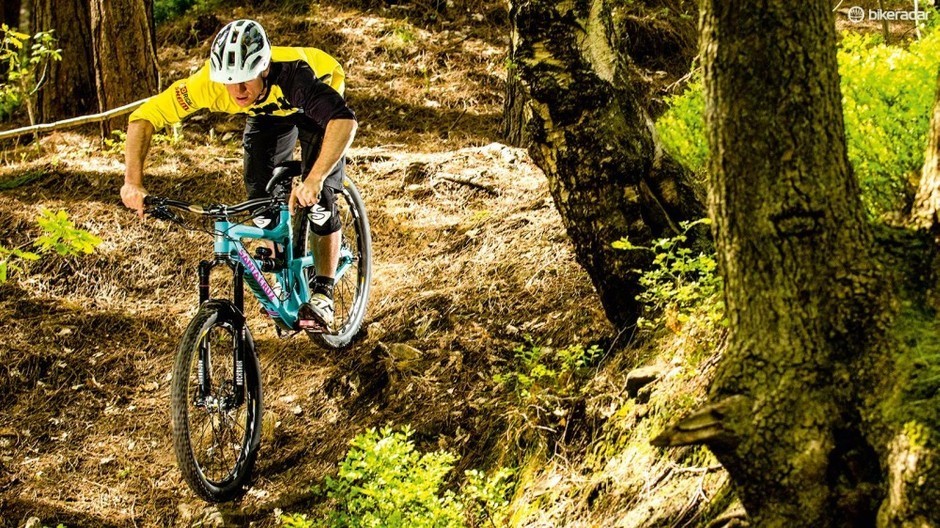
Think of all-mountain/enduro riding as trail riding on steroids, with bigger leg-burning climbs, longer white-knuckle descents and more technical features, both man-made and natural. Bikes for all-mountain/enduro riding are designed to perform well on steep descents while also being light and nimble enough to pedal uphill.
The term enduro comes from the racing world and describes a competition that has timed downhill stages and untimed uphill stages. The winner is whoever has the fastest combined time on the downhills. Enduro riding has become very popular, and the term is now often used interchangeably with all-mountain regardless of whether you’re racing or not.
This type of riding is mostly done at lift-serviced bike parks (often during a ski resort’s warmer months). You ride big, tough bikes and wear full-face helmets and body armor. The bikes boast more durable components and fewer gears, and the suspension has more travel (the amount of movement in the suspension). All of this helps you conquer jumps, berms, rock gardens and wooden ladders. Given that you’re on a perpetual descent the entire time, you don’t have to pedal much, but you still get a serious workout because you’re constantly reacting to the fast-approaching terrain.
Picture the kind of bike you always wanted as a kid: one with giant tires that can roll through just about anything. Fat tire bikes are bikes with tires that are at least 3.7 in. wide (and may be as wide as 5 in. or more). They offer excellent traction through snow and sand. Fat biking is not limited to these conditions and has proven to be a fast-growing addition to all-season trail riding. Fat bikes can be a great choice for beginner mountain bikers because they are very forgiving on rough terrain.
TBA
While you might start out on trails that are relatively smooth and flat, your ability to navigate around—or over—obstacles will develop as you gain experience and becomes part of the fun of the sport. Mountain-bike-specific trails are typically marked by skill level (beginner, intermediate, advanced and expert) and are maintained.
The most common trail type, has a width that varies from just a little wider than your shoulders on up to a track that's just wide enough for two bikes to pass. Many singletrack trails are open to one-way travel and wind their way through the best terrain that the landscape offers.
Doubletrack trails are normally double the width (or more) of a typical singletrack trail with enough room for two bikes to ride side-by-side. Often doubletrack trails follow abandoned logging roads, fire roads or power-line roads, where the tires of vehicles created two single tracks. Doubletrack trails are usually a gentler grade than singletrack and tend to have less-technical features.
These are popping up everywhere from jump-and-pump tracks under urban overpasses to lift-serviced trails at ski resorts. Expect such features as elevated bridges, halfpipes, jumps of various sizes, berms, banked corners and hairy downhill switchbacks.
What type of bike you ride is usually decided by where you plan on riding. Suspension type and wheel diameter are two key features that determine what type of terrain the bike is capable of riding. You have a wealth of options when it comes to types of suspension and wheel diameter (denoted by such terms as 26, 27.5 (650b), and 29ers).
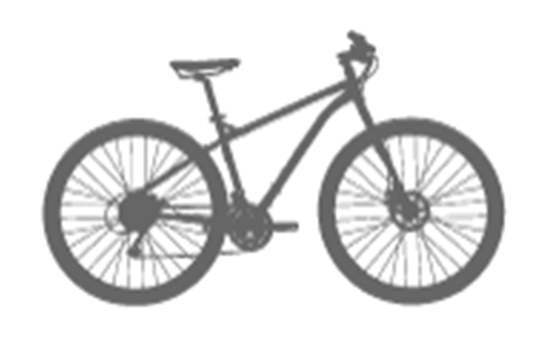
While not the most common type of mountain bike, “rigid” mountain bikes don’t feature any suspension. They are easy to maintain and usually less expensive, but most riders prefer bikes with suspension for greater comfort. Most fat bikes are rigid, and riders find that the wide tires and low tire pressure provide all the squish needed to absorb bumps in the trail.
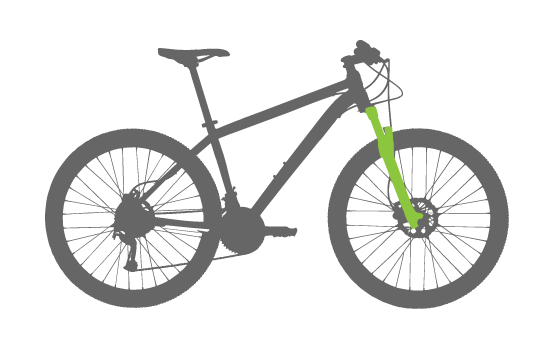
These bikes have a suspension fork in the front to help absorb impact on the front wheel, but the rear of the bike has no suspension—ergo a hardtail. Hardtails are typically less expensive than full-suspension bikes, and have fewer moving parts (which often translates into less maintenance). Most hardtails have the ability to lock out the front fork for times where a fully rigid bike is desired.
Cross-country riders typically gravitate toward hardtails as they allow more direct transfer of power between the pedal stroke and the rear tire. Hardtails can also be at home on all-mountain trails, and the lower cost and easier maintenance make them a solid option for everything except serious lift-serviced downhill trails.
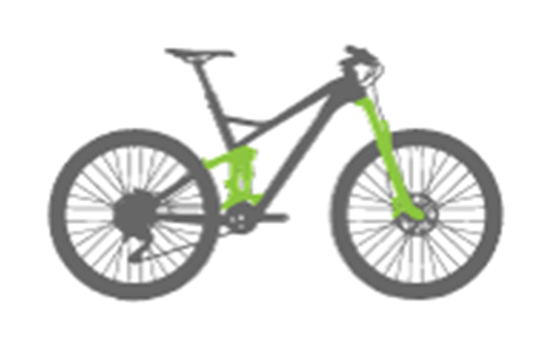
There are many variations of full-suspension bikes, but the general idea is for the front fork and rear shock to absorb the impacts of the trail. This drastically reduces the impact on the rider, increases traction, and makes for a more forgiving and enjoyable ride.
A full-suspension bike can soak up a lot of a trail bumps and chatter, but the bike can also “bob” a bit and you lose some of the energy transfer when climbing uphill. As a result, most full-suspension rigs have the ability to lock-out the rear suspension to offer better power transfer and more efficient climbing.
Bikes designed for downhill riding typically boast a lot of travel—the amount of movement in the suspension—compared to bikes designed for cross-country and all-mountain riding. As much as eight inches of travel front and rear is fairly common.
In the not too-distant past, all mountain bikes were equipped with 26 in. wheels. It is still a popular wheel size for its responsiveness and maneuverability, but now when you walk into a bike shop and inquire about mountain bikes, you are likely to be asked, 27.5 in. or 29 in.?”
Offering a middle ground between 26 in. wheels and 29ers, these bikes apply a “best of both worlds” solution, more easily rolling over terrain than the 26s, but more maneuverable than 29ers. As with 29ers, this wheel size can be found on both full-suspension and hardtail rigs.
These bikes feature 29 in. wheels that are typically heavier and a little slower to accelerate, but once you start moving you can conquer considerably more terrain easier than on a bike with standard 26 in. wheels. They generally offer excellent grip and they have a higher “attack angle”—meaning the wheel rolls over trail obstacles easier. These bikes have become extremely popular for the cross-country crowd. 29ers can be found in both hardtail and full-suspension rigs.
Kids’ mountain bikes typically have 24 in. wheels to accommodate the shorter legs of children. Most are less-expensive versions of adult bikes with simpler components. Generally speaking, these suit kids ages 10 to 13, but this depends more on the size of the child than the age. Younger/smaller children can get started biking with 20 in. wheels.
There are four primary materials bikes are made of with aluminum and carbon fiber being the most popular on mountain bikes. A brief breakdown of the materials is as follows:
These are known for their strength, comfort, durability and affordable price, but can be heavy compared to the other materials at lower price points. There are few good quality mass produced mountain bikes currently being made out of steel.
They don’t corrode, are notably lighter than steel, and often offer a lively feeling with great durability. This being said, there are few full suspension titanium mountain bikes on the market.
Aluminum is a common material for the first tiers of modern-day mountain bike frame manufacture as it is light, durable, stiff and relatively inexpensive. Aluminum is also a good material to develop pivots and hardware for full suspension components and thus most full suspension bikes have at least some aluminum in their frame.
They are often the lightest and most responsive and can have excellent high frequency vibration absorbing properties. A carbon fiber mountain bike will cost more than an aluminum bike, but will often maximize the performance of the bike.
There are many different quality grades within materials. More detailed information on carbon fiber fabrication and quality can be found here.
If you’ve started mountain biking, you’ve probably learned there are many fantastic options available in Central New York area, or within a few hour’s drive. There are trails available at every skill level from super-easy to extremely challenging. Determining which one you should ride can be difficult.
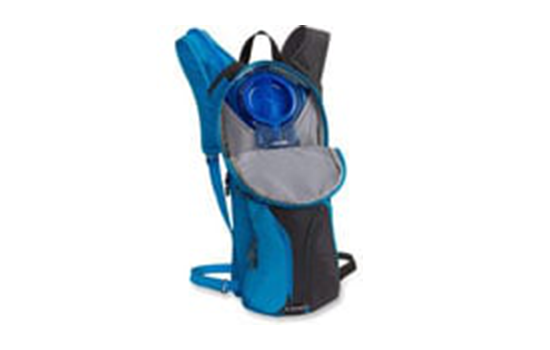
Many trails use the standard IMBA Trail Difficulty Rating System to let riders know what they might expect to find on any given trail. As your confidence and abilities grow, you can push yourself to try out the next level of trails.
A quick explanation of IMBA’s rating system is as follows:

Easiest (white circle)

Easy—Beginner (green circle)

More Difficult—Intermediate (blue square)

Very Difficult—Advanced (black diamond)

Extremely Difficult—Expert (double-black diamond)
Before saddling up, find out if you’re biking on a multi-use trail system and recognize that there may be other trail users other than mountain bikers. A few rules to follow:
Say “hi” to fellow riders, hikers, trail runners, horseback riders and so on.
For mountain bikers, “take only photographs, leave only tire marks" should apply to the leave no trace principle. Don’t leave garbage on the trail, don’t carve your name in trees or don’t create your own short cuts. Use the existing switchbacks and walk your bike if the trail conditions seem to be sensitive.
Be aware that mountain bikers usually need to yield to other trail users - pull over to the side of the trail and let runners, dog walkers and horseback riders pass - you’ll be happy you did, as spooking a horse, or a dog, might not end well. It’s also proper etiquette for downhill riders to yield to uphill riders. The reason? Well, riding uphill is challenging and once you’ve found your flow going up, you don’t want to stop. When yielding to uphill traffic on a mountain bike, you want to pull over and stop completely on the upsloping side of the trail! Many mountain bike trails are bench cut across mountains; so on one side the hill will be going up, and on the other side it’ll be sloping down. Stopping on the downhill side because it’s on your right, is a tempting idea, but not the appropriate method. This can put you at greater risk for tipping off the trail. It also makes it more difficult for the person passing to get by, since they’re now sandwiched between you and the uphill slope of the mountain.
Respect trail closures and trail signs - simply put, if a trail is closed, don’t ride it. The local mountain bike club probably closed it for a reason. Sensitive habitat, erosion, trail re-routing or a change in land ownership are just a few of the reasons the trail may be closed.
Remember, you’re in their environment. Be prepared to come across wildlife on your rides and respect their space. Try not to spook animals. Make noise constantly, especially around blind corners, it’s also a perfect time to test out your singing skills!
Before saddling up, find out if you’re biking on a multi-use trail system and recognize that there may be other trail users other than mountain bikers. A few rules to follow:
The most important and obvious piece of gear is the bike. Finding the right bike shop with knowledgeable staff you can trust is absolutely essential. Prepare to stand up to the onslaught of what I will call, only-2000-dollar-plus-bikes-have-wheels-that-turn-bullshit. When you are a beginner you do not need an expensive bike, with high-end components. But on the other hand you don’t want a cheap low-quality bike that will have a short life once you quickly advance from beginner to intermediate to advanced. Cheap bikes with low quality components will be heavy and will not shift smoothly. This combination will quickly have you on the road to Quitsville. Used bikes might seem like a good idea, but at this point in your biking career, they are not. You need to go to as many bike shops as you can until you find a special bike shop guy/gal that is really helpful. You need to find a shop guy/gal that will honestly, humbly, and enthusiastically show you good priced entry-level performance mountain bikes that cost between $500-$1000. What you are really paying for is the right to bug the living shit out of a really helpful person who’s going to be able to answer all your clueless questions about trails, bikes, bike maintenance and everything else today, tomorrow and forever! He/she is the key to making this all work.
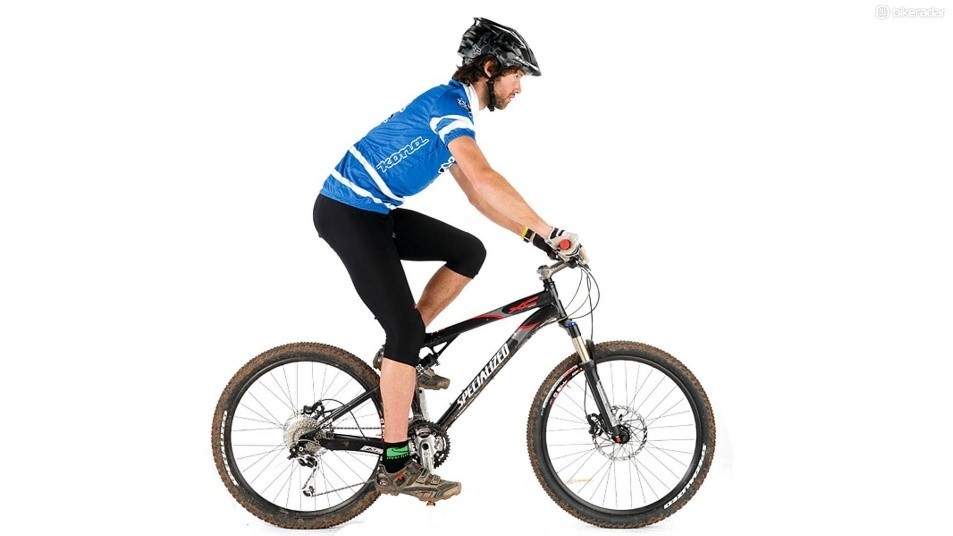
How your bike fits you is one of the most important aspects of riding. If the fit is painful, you’re not going to spend much time in the saddle, no matter how excited you are to ride that new bike. To get the right fit, two elements are key: seat height and reach. The seat height should be high enough to give you a very slight bend in your knee when your foot is at the bottom of the pedal stroke, as mentioned above. Proper reach means your arms and torso make a 45-degree angle over the bike. Too long, and your back will be sore reaching for the handlebars; too short, and your knees will be too close to your arms. When you’re shopping for a bike, make sure to take it for a test ride to see that the size is correct for you. Again, find a shop and that special guy/gal you feel you can trust to help you with selecting, not only the right bike, but the right size bike too.
No need to experiment on your own; go to the expert and have them set that right bike, that is the right size for you as to fine tune the cockpit, tires, brakes and suspension to perfectly fit you.
One of the questions we see very often—especially among newbie MTBers—is, “How do I wash my bike?” It’s not as hard as you might think, though there are a few words of caution necessary to ensure your bike stays in tip-top shape. Make no mistake, mountain bikes are hardy pieces of modern engineering and they’re made to get dirty. Don’t be afraid to get out there and get rowdy, and don’t feel ashamed if you don’t clean your bike at the end of every ride.
The obvious first step is setting up a place to wash your bike. You can go as basic or as fancy as you’d like here—either use a purpose-built bike repair stand or simply lean it up against the nearest wall or tree. There’s no right way to create a wash station—though some might argue there are wrong ways—just do what works for you and fits your budget.
Beyond a place to wash the bike you’ll need some pretty basic equipment: a bucket, dish soap, brushes and rags, and a hose with a sprayer attachment. Again, you can go as high or low tech as you want here when it comes to the types of brushes and cleaning implements you use. Some of us just use an old toothbrush, or simple bottle scrubber to get into the tight places around and frame and drivetrain, while others prefer to go all out with something like Park Tool’s Chain Gang Cleaning System. You really can’t go wrong either way.
If you want to take your cleaning to the next level, ditch the dish soap and grab you some bike-specific cleaner such as Muc-Off.
Have you ever hand-washed a car? Washing your bike is essentially the same procedure. You’ll start by spraying the entire bike down, using low- to medium-water pressure to knock off as much of the worst grime and mud off of your frame, wheels, and components. Just make sure you remove anything you don’t want to get soaked such as your seat bag and frame pump. If you don’t want to get your saddle too wet, just don’t spray it down.
Caution: Be especially careful about spraying water into any part of your bike that has bearings—your bottom bracket and wheel hubs. Don’t use high-pressure water, and try not to spray water directly into the bottom bracket, hub ends, or anywhere else with a bearing seal.
Just like washing a car, squirt some dish soap into your bucket and fill it with water. Now get ready to use the brushes and rags you have on hand to suds up your bike. Just be sure to not use a brush with hard or super-stiff bristles on your frame or any other part of the bike that could get scratched. Lather your trusty bike up, scrub all the dirt and grime off, and rinse it clean.
When it comes to the wheels and tires, just be as fastidious as you choose. If you want to scrub the knobs of your tires clean go for it, just realize that cleaning the tires isn’t all that necessary unless you’re also taking the time to inspect your tread and search for potential problems like punctures or cracks in the sidewalls.
Once you’re satisfied that you’ve cleaned your bike as best you can, hose it down one more time and get all that soap off.
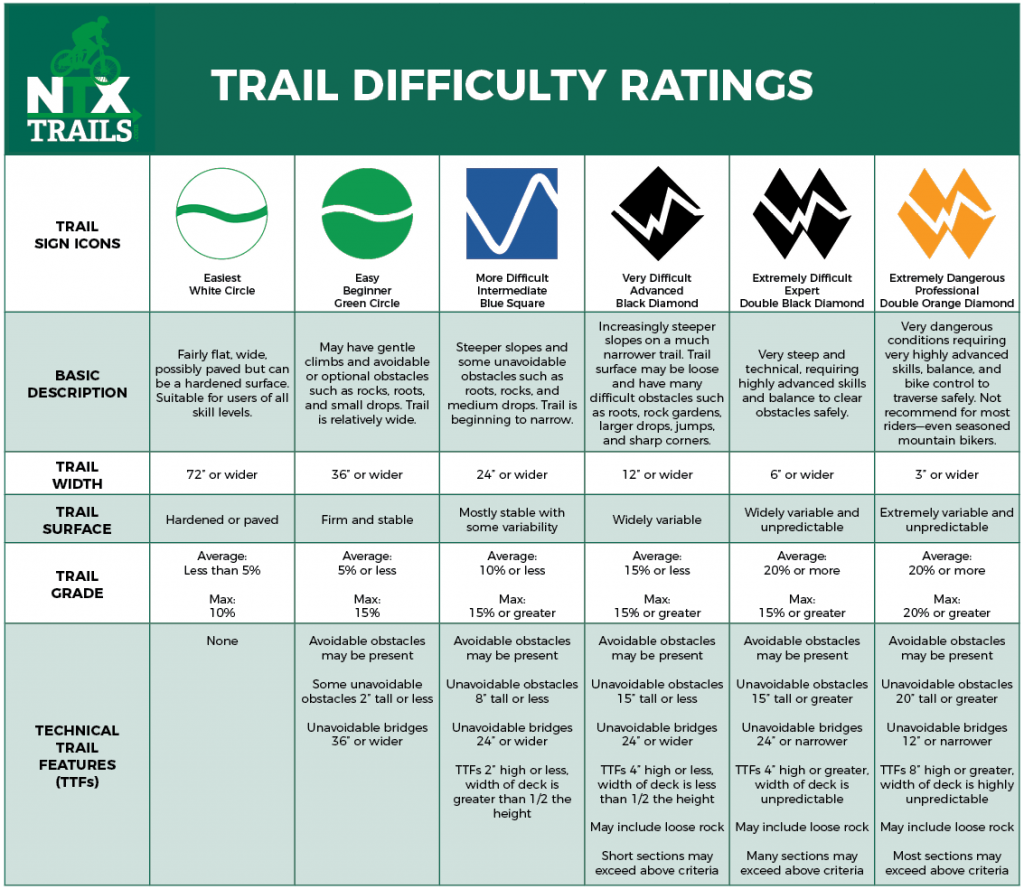
Now we come to the drivetrain—collectively the front chainrings, the chain, derailleurs, and the cassette. It’s ok if you’ve already soaped up and rinsed off these parts, we’re going to give them a little bit deeper clean.
First up, it’s a good idea to spray the drivetrain down with a degreaser. Again, you can use a specialty bike chain degreaser like WD-40 Bike, but we prefer something you can get at almost any store such as Purple Power. Degreasers are simple solvents that help remove excess grease and oil from your drivetrain. Spray the degreaser onto the gears and chain, then use a brush with long bristles to get down in between the sprockets, teeth, and chain links.
Be careful to not overspray and get degreaser on your brake rotors or pads as this can make the brake’s surfaces slick and—at least temporarily—lessen your stopping power.
Once you’ve fully degreased and cleaned the drivetrain, hose the entire area off one more time. Feel free to soap the drivetrain up one more time to get it extra clean before rinsing.
Now that your bike is all shiny and clean it’s time to dry it off. Let’s keep it simple here folks. Unless you’re worried about water spotting, just let the thing air dry in the sun. Alternatively, you could wipe it down with a soft cloth or towel, or if you really want to expedite the process you can blow it dry with a leaf blower or a compressor-powered air gun.
If conditions are cloudy or not all that warm, you’ll probably want to go ahead and wipe the bike down to prevent rust from setting in. If that’s the case, focus on the chain and other moving parts. You can also pick your bike up a foot or so off the ground and drop it onto the tires a few times to knock water out of places you can’t easily reach with a cloth.
Once the drivetrain is completely dry, make sure you re-lube your bike chain. If you haven’t already, choose a lube that’s made for the conditions in which you typically ride. Check with your local bike shop to find out what’s best for you. WD-40 is not a lube, it’s a solvent/degreaser. Do not use WD-40 as chain lube (although WD-40 DOES make bike-specific lube products).
Shake your chosen lube’s bottle as directed, then apply a thin layer to the chain as you backpedal. One time around is probably good enough for an application. After you’ve gotten the lube on the whole chain, keep backpedaling for several more rotations to work the lube into the chain. If you have the bike hanging from a work stand or something similar, crank the pedals forward and shift up and down through the gears to lube the cassette and chain rings.
Wipe off any excess lube with a clean rag by backpedaling again while you hold the rag lightly against the chain. This step is just as important as cleaning your drivetrain because excess lube will make grime build up on the chain more quickly.
Now that your bike is clean, there’s only one thing left to do: go ride it! Seriously, we don’t clean our bikes to keep them showroom fresh, we clean them to extend the life of the frame and components. Your bike was made to get dirty, so do your duty and go shred your favorite trail.
How often are you supposed to check tire pressure, shocks, brakes, etc.?
Depending on where you ride and how hard you ride your bike, it is worthwhile to bring your bike in for a basic tune and check-up about every 250 miles (about every month and a half with regular riding). If you bring your bike into the shop regularly for service, they will be able to catch issues before they cause trouble on the trail. Tires, brake pads, brake rotors, and chains are all parts of your bike that wear out with time. Replacing them keeps you safe and ensures more expensive parts – like your drivetrain – last longer.
You probably know you need a good floor pump at home for airing up your tires. You don’t need anything fancy, but I highly suggest buying a pump that has an air pressure gauge. At first, you’ll probably use the tried-and-true method of squeezing your tires to see if there’s enough air in them. The more you ride, the more you’ll start experimenting with varying PSI levels (if your bike is set up tubeless), so a pump with a pressure gauge becomes a necessity.
As you start venturing out alone you’ll need to have a saddle bag or backpack with some basic tools and gear to keep your tires spinning in the event of a mechanical issue. If the bike you’re riding isn’t using a tubeless tire setup, you should get that setup done ASAP. Once you’re running tubeless, you can keep some basics such CO2 inflators and tire plugs handy to keep you going in case you get a puncture. Even so, you should still carry a spare tube in your saddle bag in case you have a puncture so bad your sealant can’t plug the hole. Carrying a small hand pump—either attached to the frame or in a backpack—isn’t a bad idea either. A patch kit, tire levers, a small multi-tool with several Allen wrenches, chain breaker tool and replacement chain quick link, extra sealant and first aid kit may be good to have.
Even though buying a brand new bike right away, and spending a huge chunk of money, may not be necessary at the beginning, you should not skimp out on basic gear. At bare minimum you need a helmet and hydration pack. As long as you’re riding with more-experienced friends that’s all you absolutely need to get going.
You’ll soon find, however, that there’s quite a bit more gear you’ll want to have to make your rides more safe and enjoyable, as well as set you up to be self-sufficient when you start venturing out alone. It only takes scraping your hand against the bark of tree once to make you want to buy a good pair of riding gloves, and getting other various scrapes and bruises will make you look into purchasing additional protective gear. Don’t go crazy. Most of the time just a good pair of gloves is all the protective gear you’ll need beyond a helmet. As you get more adventurous and aggressive in your riding you may need to add more gear. A basic first-aid kit is always good to have.
Lastly, as your rides get longer and you log more saddle time, don’t be surprised to find yourself shopping for a new chamois and some anti-chafing cream.
How your bike fits you is one of the most important aspects of riding. If the fit is painful, you’re not going to spend much time in the saddle, no matter how excited you are to ride that new bike. To get the right fit, two elements are key: seat height and reach. The seat height should be high enough to give you a very slight bend in your knee when your foot is at the bottom of the pedal stroke, as mentioned above. Proper reach means your arms and torso make a 45-degree angle over the bike. Too long, and your back will be sore reaching for the handlebars; too short, and your knees will be too close to your arms. When you’re shopping for a bike, make sure to take it for a test ride to see that the size is correct for you. Again, find a shop and that special guy/gal you feel you can trust to help you with selecting, not only the right bike, but the right size bike too.
A chamois (pronounced shammy) is designed to give your sit-bones a little extra cushion during your saddle time and to help prevent chaffing. It should be the undermost layer of clothing you wear while riding your bike. You don’t have to wear one, but I highly recommend one if you’ll be pedaling for any extended period of time (1+ hours).
Bike-specific clothing makes for a more comfortable ride, no matter what style of biking you're doing. That said, different styles of mountain biking will dictate what type of clothing you'll choose.
Consider rainwear and stowaway wind jacket for wet and cooler days.
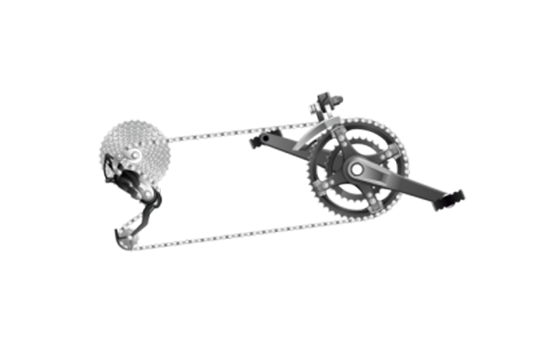
Mountain bike helmets typically offer more coverage and protection than road bike helmets. Look for one with plenty of venting and protection at the lower back of the head. For downhill riding, consider a full-face helmet; most bike parks rent those models.
Regardless of style, all models on the market have to pass rigorous safety tests. Some helmets now feature the new MIPS technology, a low-friction layer that slides independent of the outer shell and limits the rotational forces to the brain when the helmet gets hit at an angle. For more considerations, see our article, Bike Helments: How to Choose.
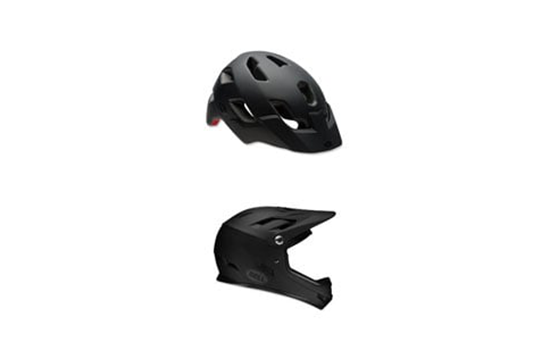
Hydration packs are too bulky for road bikers, but their convenience makes them ideal for mountain biking. Go with a pack that has sufficient storage space for an extra clothing layer, repair essentials and snacks, and a clip to secure your hydration sleeve to the shoulder or sternum strap of the pack.
The right shoe/pedal combination depends on your comfort level and what type of riding you’re planning on doing.
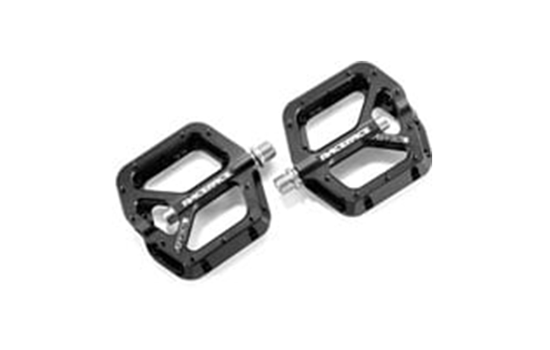
Beginners and people less confident on mountain bikes can benefit from starting with flat platform pedals so you can get on and off the bike and put your foot down quickly without having to unclip from the pedal. This is a good way to build technique, and when and if you make the transition to clipless pedals, it’s much smoother.
If you’re buying platform pedal shoes for downhill riding, get ones with a tacky sole so that they can sink into the pedal pegs, but you can easily dismount if things get dicey.
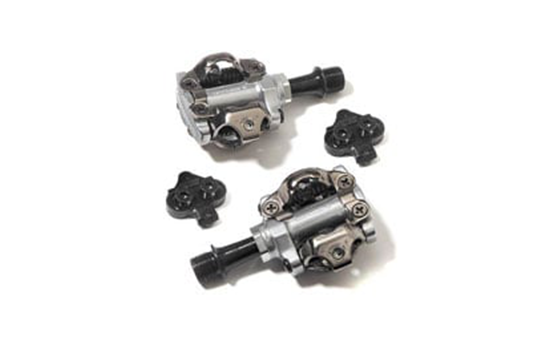
As your skills progress, you can go with either clipless pedals and compatible shoes, or stick with platform pedals. Clipless pedals (which despite the name, actually attach to your shoes) deliver a lot more control and power transfer, but also demand more commitment in tricky terrain.
When learning to ride with clipless pedals, give yourself plenty of practice time on soft grassy terrain to get used to connecting and disconnecting your foot from the pedal.
For all styles of riding, choose shoes that have hard, protective toes, some decent grip for when you have to hike and some water protection for rain and mud.
Perhaps the biggest key to successful mountain biking is your body position. Keep yourself loose on the bike, knees and elbows bent to help you remain responsive to the terrain. You want to let the bike take most of the brunt of the trail; shift your weight according to the changing terrain and features.
Mountain bike trail surfaces include rocks, roots, ruts, sand or mud. The variable terrain and the potential obstacles are all part of the fun but can be unnerving to beginners. Being in the right body position helps you get through tricky sections of trail.
There are two primary body positions: neutral and ready.

When you’re riding non-technical sections of trail, you want to be in a neutral position on the bike. This keeps you rolling along efficiently and comfortably while allowing you to easily transition into the ready position for technical terrain. The neutral position includes:
When the trail gets steeper or rockier, it’s time to move into the ready position (sometimes called the attack position). The ready position gets you mentally and physically prepared to take on technical sections of trail. The ready position includes:
Positioning your seat properly can help you get in the correct body position for climbing and descending.
For climbing, position your seat for maximum efficiency while pedaling. With your foot at the bottom of the pedal stroke, you should see a slight bend in the leg, reaching about 80-90 percent of full leg extension. This helps you pedal efficiently and powerfully using your major leg muscles.
When the trail tilts downward, go in the opposite direction, shifting your weight behind the saddle and over the rear wheel to avoid going over the bars.
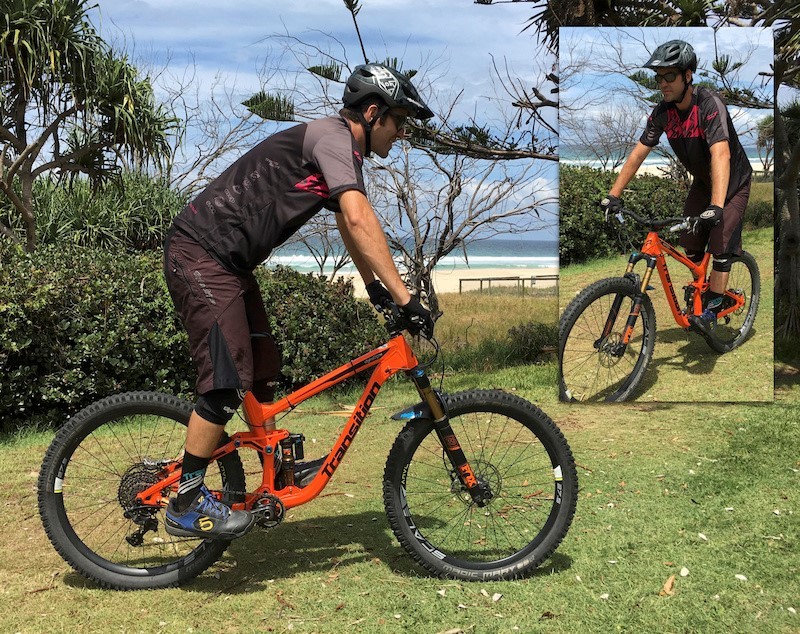
Descending is where the fun begins and—for beginners—can be the most intimidating. First drop your seat, as you want a lot of clearance between your butt and the seat. Lowering your seat lowers your center of gravity, which gives you better control and more confidence through steep descents. You may need to experiment with different seat heights to find what feels best.
This lets you respond to the variable terrain more easily, and helps you avoid getting bucked if you hit an unexpected bump and the seat comes slamming upward. Some bikes come with a “dropper post” (dropper posts are a godsend for this) which allows you to adjust the seat height on the fly via a remote lever on the handlebars.
Keep your body low to the bike and position yourself far back so that your butt is practically suspended over the rear tire; make sure you’re not sitting down and that your knees are bent. This lets the bike take the brunt of the terrain you encounter and also keeps your weight back, reducing your chance of going over the handlebars.
Unless you’re pedaling, keep your feet and pedals parallel (the 3 and 9 o’clock “platform”) so that pedals won’t clip a rock or stump. Bend at the knees and elbows and relax your muscles so you can respond quickly to the changing trail conditions. Avoid gripping the handlebars too tightly.
A beginner's mistake is looking at spots you want to avoid rather than focusing on where you want to go. Staring directly at that rock you don’t want to hit will nearly ensure that you’re going to smack right into it. It’s called “target fixation;” your bike goes where your eyes are directing it to go. Instead, look past obstacles to where you actually want to go. Keep your chin level to the ground, eyes forward, and try to look as far down the trail as possible, using your peripheral vision to avoid and negotiate obstacles immediately in front of you.
Scan the trail 15 – 20 feet ahead so that you see the upcoming terrain changes and obstacles. Then, move your eyes back toward your tire. Doing this up-and-back action allows your eyes to take in lots of information so you can make adjustments as needed. If you stare at a root or rock, chances are you’re going to hit it. Instead, let your eyes flow ahead to better allow you to pick your line.
Knowing hazards ahead of time can help you adjust your balance and pick a line around them.
What hazards should you look for? That depends on your skill level. A log that will stop one cyclist may be a fun bunnyhop for another. Generally, look for loose rocks, deep sand, water, wet roots, logs and other cyclists, hikers, and animals.
Your bike’s job is to roll over technical terrain. Your job is to let your bike do its job. That means keeping your body loose, so it can move beneath you. Hover your butt off the saddle when riding over obstacles like roots and rocks. The more technical the terrain, the more room your bike needs to move. When ripping down a descent, think: “pushup arms” and “cowboy legs,” and flare out your elbows and knees so your body lets the bike to flow rather than fighting it.
It’s going to feel counterintuitive, but holding speed—and even speeding up—when the terrain gets challenging makes clearing tough sections of trail easier because your bike has the one thing it needs most to keep moving forward: momentum. Momentum is your best friend out there, maintain it whenever you can.
Braking seems simple: you squeeze the levers and the bike slows down. That is the gist of it, but learning more about how to brake goes a long way in making you more comfortable and secure on the bike.
Braking should be consistent and controlled. Most of your braking power comes from your front brake, but grabbing a handful of front brake will send you over the bars. Instead, lightly apply the brakes, and do so evenly on the front and back brakes. Avoid sudden, fast squeezes to help prevent skidding.
While braking, brace yourself by moving your hips back, dropping your heels down and keeping a slight bend in your knees and elbows. This body position helps you stay in control and from getting too far forward on the bike.
If your mountain bike has disc brakes, keep the index finger of each hand on the brake levers and your other three fingers on the handlebar grips. This gives you sufficient braking power and control while riding. If you have rim brakes, try two fingers on the brake levers since they typically require more force to engage the brakes
When approaching a turn, brake before you hit the turn, and then let your momentum carry you through. This allows you to focus on your technique through the turn and exit the turn with speed.
Momentum can also be your friend when getting up and over obstacles in the trail. Beginner riders often slow way down when approaching obstacles. Controlled momentum can help you get through these tricky sections of trail.
You will be tempted at some point to grab both brakes and pull ‘em to the bars with all you’ve got. Resist this temptation! Mountain bike brakes are powerful enough that you need just one (maybe two) finger(s) to modulate your speed. Adjust your speed before the tricky stuff, like rock gardens and corners, and then maintain your speed through them. If you do find yourself going into a turn too hot, stay off the front (left) brake. Stopping your front tire will send your front tire into a slide, which is likely to send you over the bars and onto the ground. Hit the rear (right) instead; you might skid, but you’re more likely to stay upright.
Since most mountain biking involves at least some ups and downs, it’s good to know how to shift your gears properly. Proper shifting habits not only save wear and tear on your bike (especially your chain, front cassette and rear cogs), they enable you to power yourself more efficiently up and down hills.
Choosing the correct gear for the trail ahead of you can be challenging at first; just remember to look ahead and anticipate what you will encounter. If you’re approaching a climb, shift to an easier gear as you hit the base of the climb. If you see a long downhill in front of you, shift to a harder gear. Rolling terrain is trickier, but with some practice you’ll be shifting without even thinking about it.
Beginning riders should practice frequent gear shifting. This builds muscle memory so you can intuitively shift up or down as needed without having to think about whether you’re shifting to an easier or more difficult gear.
Don’t wait to shift until you’ve already started up that big hill. Always shift to the gear you will need before you hit the steep terrain. This allows you to keep a steady cycling cadence for maximum power. It also prevents awkward shifting under a load that is hard on your gears and could cause your chain to pop off.
If you have trouble finding the right gear for the terrain you’re riding, err on the side of spinning in an easier gear than mashing in a hard gear.
Another important rule is to prevent cross-chaining. This occurs when your chain is stretched awkwardly across from the small chainring in the front to the small cog in the rear, or the big chainring in the front to the big cog in the rear. This holds true for double and triple chainring setups. Cross-chaining can result in your chain popping off from the strain; it also stretches your chain over time, shortening its lifespan.
Finally, always remember to keep pedaling as you are shifting. Not pedaling as you shift can damage or break the chain.
No one likes to fall off a bike, but if you’re mountain biking, it’ll probably happen at some point. When you fall off your bike, try to keep your arms in. Your instinct may be to reach out to brace your fall, but this can result in a broken wrist or collarbone. During a fall, most damage is limited to personal pride. Pick yourself up, dust off and check to make sure you’re not injured. Then check your bike. The seat or handlebar may have twisted and the chain may have come off.
Check your brakes and gears, too, before charging on. A trailside repair or adjustment may be needed, so it’s wise to carry a multi-tool and a small first-aid kit to patch any personal scrapes.
As you ride the trails, you’re bound to get into a tight spot eventually. If you get in a rut on the trail, don't "fight the bike." Just do your best to ride it out. Impossible? There’s no shame in stopping and walking it out. Walking is absolutely an accepted part of mountain biking. Many trails feature mandatory hike-a-bike sections that are too difficult to ride through, up or down.
Knowing how mountain biking culture operates, I think there’s better than a 50% chance that you started mountain biking due to the influence of someone else. If this describes you then you’ve already got a riding buddy or two willing to take you out on rides fairly often. I’m not saying you should never ride alone—you definitely should—but in the early days it’s always a great idea to ride with others often. So, if you don’t have an MTB-addicted friend you can spin with, find one soon.
There are many benefits to riding with an experienced rider. Not only can they help you with basic skills and show you the best lines to follow on the local trails, they’ll also have a better idea of what trails fit within your current skill level. You’ll simply enjoy the ride much more with friends. Not only will you enjoy the camaraderie, but you’ll also feel better about pushing your limits in the company of others. Almost all of the more difficult trail features I’ve conquered were done in the presence of friends. Not only did I feel better about taking risks—knowing I had help if necessary—but those with more skill and experience could demonstrate how to ride those features.
Beyond riding often with friends, you should also go to beginner clinics and attend group rides. Notice I said clinics plural. That’s right, my suggestion is that you attend beginner clinics multiple times. Not only will you get added instruction and reinforcement, but you’ll also get to see just how far you’ve progressed over time. You should also join your local MTB club and keep abreast of all the latest clinics, group rides, and events. The more you attend, the better a rider you’ll become.